Star Trek – U.S.S. Enterprise – NCC-1701

“Space, the final frontier…” The thrill that my friends and I felt that evening in September of 1966 for the premier of Star Trek on NBC (we were all of 11 or 12 years old) is still resonant in my mind. How cool was that new spaceship named Enterprise with its saucer-shaped main hull and cylindrical appendages – like nothing that we had ever seen before. To this day, I am still blown away by all that Star Trek technology and the original series is still tops in my book. So you can imagine my anticipation and delight upon hearing of this new 1:350 kit from Polar Lights of the U.S.S. Enterprise from the original series. Sure, we had the refit in 1:350, and even the NX-01, but c’mon, what’s life without Captain Kirk’s original mount in that same big scale? But enough of all that memory lane stuff, let’s take a look at this kit and see how my anticipation and delight have fallen short and been fulfilled.
The Box
Weird as it may sound, I have to start this review with the box that the kit itself comes in. It’s pretty good sized at 17” x 17” x 6” deep. It’s also quite hefty in weight. The box itself is totally covered in artwork and photos of the constructed and finished kit. The artwork on the box top is quite cool with a picture of the Big E from the bow and the ghost-like images of Kirk, Spock and McCoy above it all (where’s Scotty?). The box also serves as the painting and decal placement instructions, with various paint colors (by Model Master and Testors in acrylic and enamel forms, and Tamiya acrylic) called out and pointing to the appropriate areas on the artwork. The box bottom even has stuff on it, like photos of the completed shuttlecraft hangar bay and bridge. It’s definitely a box that you’ll hate to send to the circular file once you’re done with the kit. The only down-side to the boxing is that it’s not very strong; mine has already torn at the seams and required taped repairs.
The Kit
The first thing that you notice upon diving into the contents of the kit box, besides the impressive size of this model, is the colors of the plastic parts. You could conceivably build this kit and not paint it, since the various components are molded in their appropriate colors: the ship’s exterior in a light grayish green, the sensor dish in copper, and so on, but really, you just gotta paint this thing up. As for that grayish green exterior over-all color, I think Polar Lights has hit it spot-on with their plastic color. Over the years, I have researched the living daylights out of the color of the Enterprise – was it white? Was it blue? Was it gray? Time and time again, however, I always end up with that light gray-green color (really more of a light gray with a kiss of green). In any event, as always, it’s up to the individual modeler to hash that out to his own opinions, research and tastes.
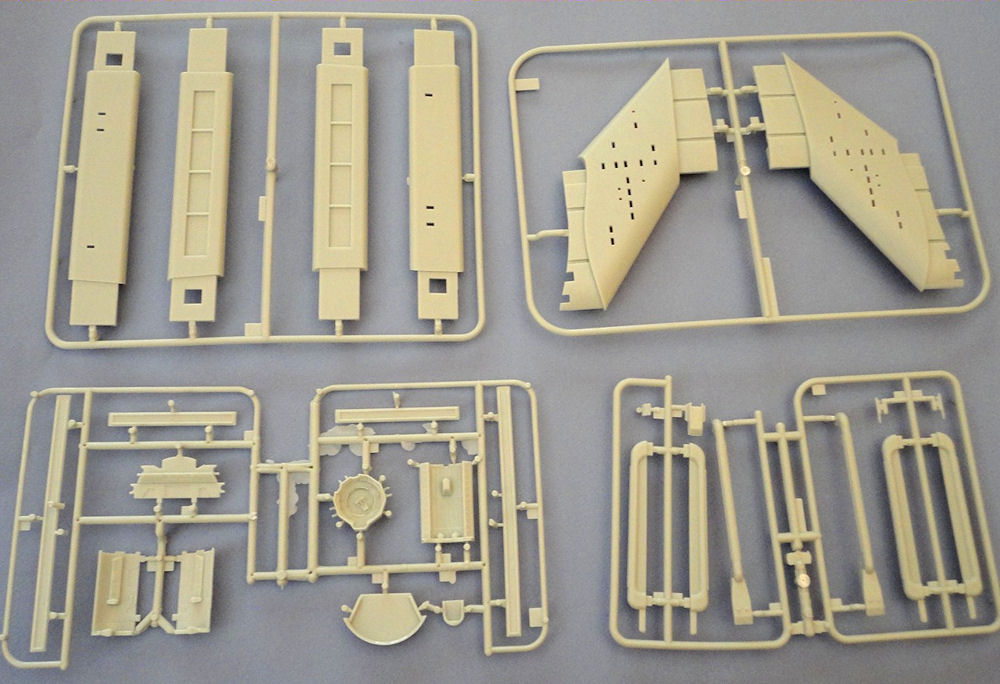
Anyway, back to those parts. There are a total of 127 parts to the structure of the model. The assemblies are broken out logically into halves as on previous Enterprise kits: upper/lower primary hull, left/right warp nacelle halves, left/right secondary hull halves, etc. Many details, such as the Bussard collector domes, are complicated multi-part assemblies which are going to look great when done. While so many newer kits are over-engineered, I think that this kit is done just right. Options are provided for open/closed hangar bay clamshell doors and bridge position.
On top of all that, you have 102 parts that make up the various window inserts, which are affixed to the interior of the model’s parts. I say 102 parts, but in reality there are 34 of these pieces, with each “set” of insert parts supplied in three differently colored plastics: smoke, white, and clear. The kit itself is made with the ability to be lit up, so it offers some flexibility and choice as to what window inserts you ultimately use. For me, I’m going no lights and will use the smoked parts for the many hull windows (more on that later).
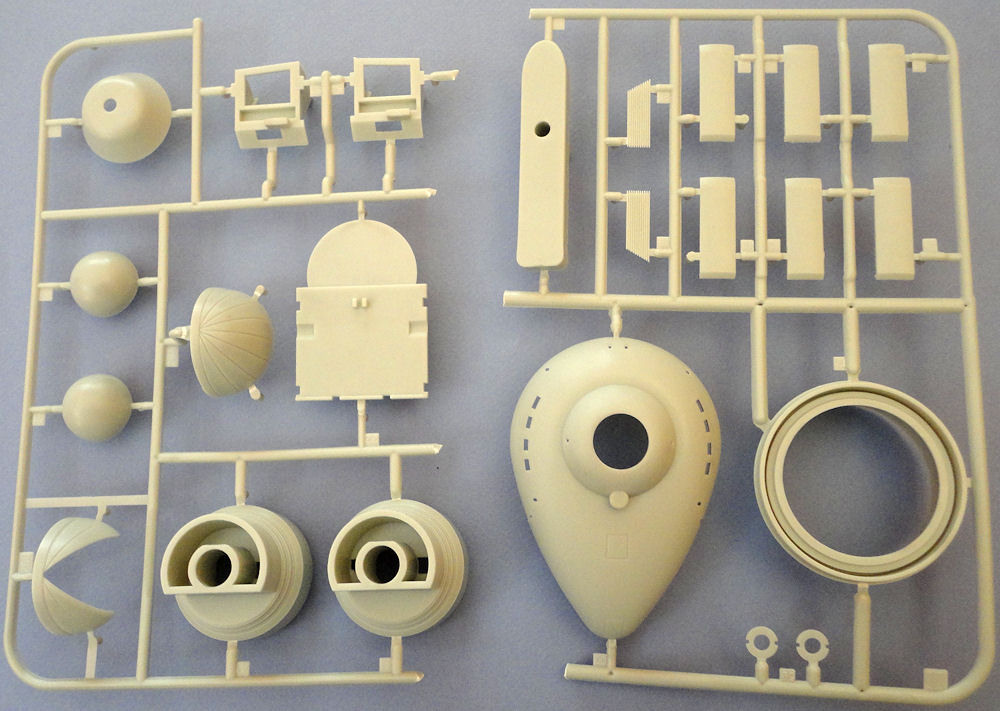
Additional clear parts are supplied for the Bussard collectors (the domed parts of the forward sections of the warp nacelles) and a few other things. These clear parts were wrapped in a soft foam-like material, but despite that, my Bussard collector domes were marred – which I’m sure that some careful polishing and Future will fix. Then you get a stand which consists of a domed-shape base (in black plastic) with a steel rod – nice and sturdy.
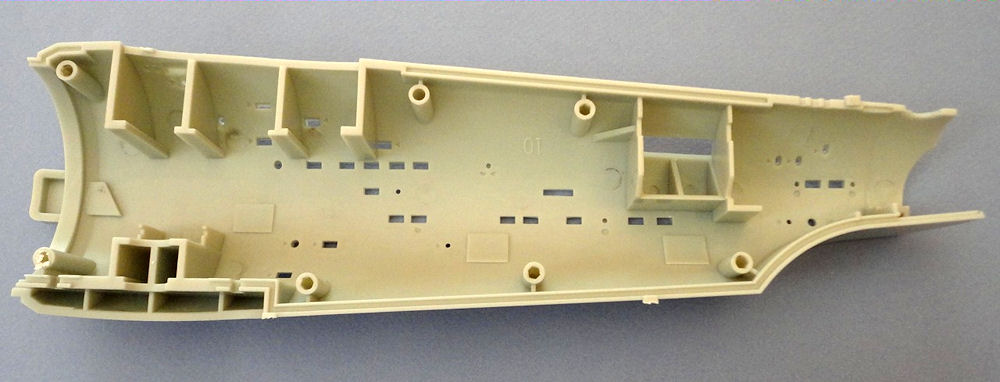
The kit parts themselves are quite beefy and heavy – no skimping on the plastic here. Interiors of parts like the engine support pylons, main access pylon, and saucer are all reinforced inside with ribbings and honeycombs. Usually, sink marks are an issue with this type of thing, but as of yet, I cannot find any of notice on the various parts of my sample. The areas where, for instance, the warp nacelle pylons join their pylons and then the engineering section are quite heavy and well thought-out, in what looks like a concerted effort on the part of Polar Lights to eliminate that dreaded warp nacelle droop.
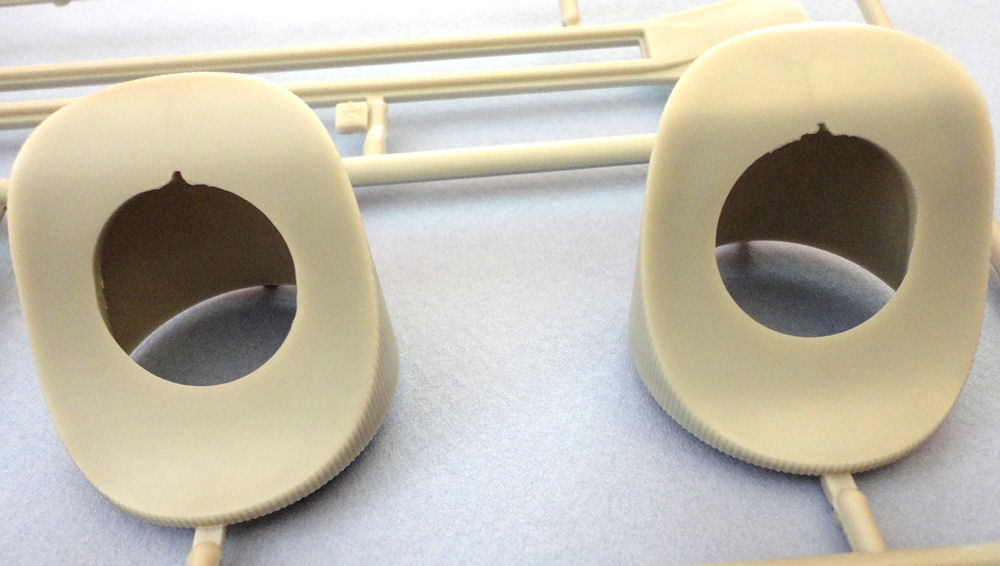
All of the parts in my sample were cleanly cast and showed no obvious flash. My only problem was short-shots in the warp pylon end caps (see accompanying photo). A bit aggravating, but should be easy enough to fix with some epoxy putty.
Some interior detail is provided in the case of the bridge and the shuttlecraft hangar bay – with a tiny shuttlecraft supplied. The shuttle itself comes in four parts and, despite its diminutive size, is quite accurate in appearance. The bridge, a one-piece affair, is also quite accurate in appearance and, like the shuttlecraft, very tiny.
The 8-1/2” x 11-1/2” decal sheet is quite nice and features a full complement of all of the Big E’s markings as she appeared during the series production run. The decals don’t appear too thick, color saturation looks good, and the colors themselves seem spot-on. Accuracy of the markings also appears to be quite good. You even get two decal options for the tiny shuttlecraft (including the Galileo) and some decals for the bridge displays and main view screen. There are also decals for the interior of the shuttlecraft hangar bay.
The 14-step black and white instruction sheet (which is exactly what it is – all folded, printed front and back) is logically laid out and easy to follow. Assembly sequence and parts are represented by line drawings. The instructions are also very clear and direct at the end as to how best to mate, glue, and support the various sub-assemblies in order to insure good alignment and strength of mating areas – like I said, this is one heavy model. The front page of the instruction sheet has a nice bit of narrative information on how the model was researched and engineered, and includes assembly hints and painting tips – all worthwhile reading. They also allude to the fact that the previously mentioned window insert parts may need to be “divided further”— a nod perhaps to that pesky fit problem I mention below.
Assembly
Since this is an in-box review, there’s no real assembly here. I did, however, test-fit some parts. The two massive saucer sections (upper and lower) in my sample were warp-free and fit together well. Then there’s all those little window inserts, which had me concerned a bit – and rightly so. I ended up trying to fit the smoked color window insert (#126) into the right side of the main access pylon (part # 8). Sure enough, it’s a pretty tight fit with the little protrusions not fitting uniformly into all of the window openings, with many not fitting flush (too low) with the exterior surface. I’m thinking that the intro assembly hints on the front page of the instructions are correct in that it will be necessary to cut these parts up and fit them in those parts to the insides of the hull parts for a better/easier fit. I do have to say that the smoked plastic inserts, where they do fit, look fantastic!
Opinions
I talked about anticipation and delight at the start of this review. Well, this kit definitely fulfilled my anticipation and expectations. The model is impressive in size (34” in length when assembled). I have an extensive collection of black and white and color photos of the actual 11 foot filming miniature from its production days and in its current state as a museum piece, and as far as I can tell, this model is extremely accurate. The primary hull has all the right shapes, curves, and details; the warp nacelles have the right taper and are spot-on in their details. I thought that the sensor dish was too large at first, but it does seem to be the right size. All of the detail work on the forward sides of the secondary hull looks to be present and correct. Even those little black rings just behind the Bussard collectors on the warp nacelles are done properly with the correct convex shape to each ring. I’m sure that others may find fault, but it looks pretty darned good to me.
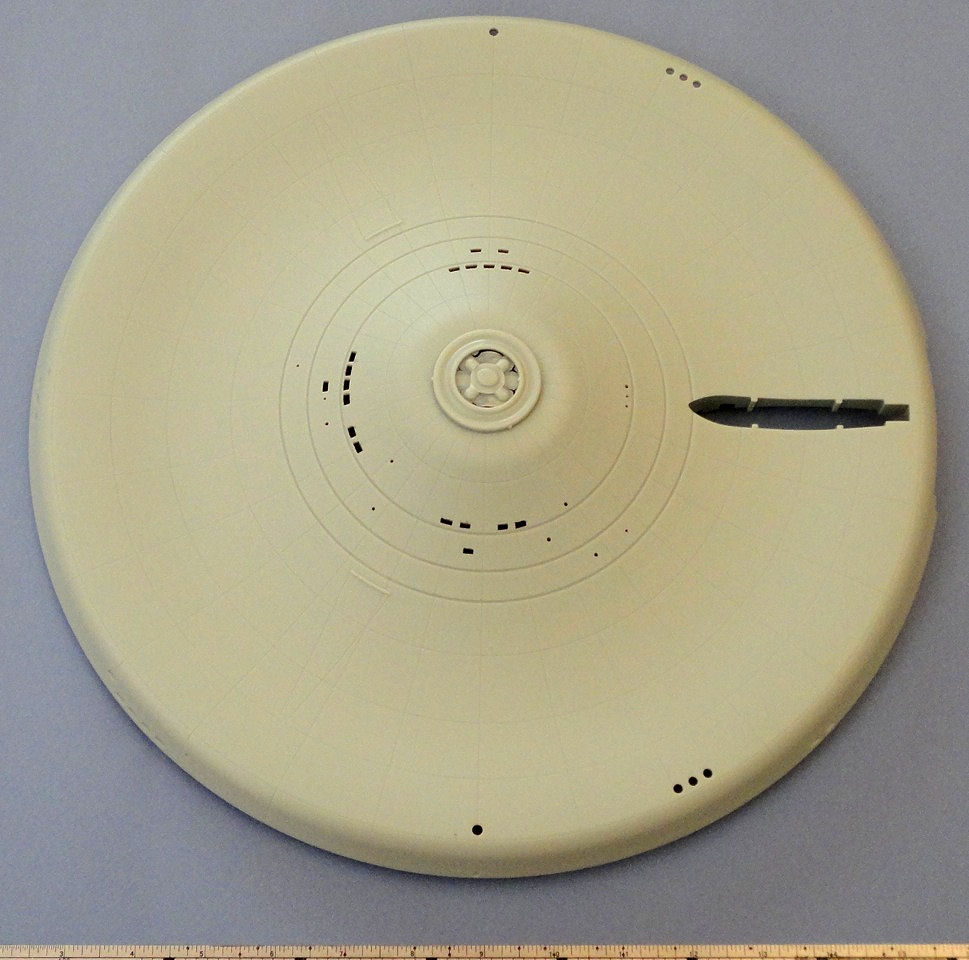
All that being said, I now come to my biggest disappointment with this kit: the engraved panel lines on the saucer section, representing the deflector grid. Sure, they’re restrained in appearance, but they are not supposed to be there engraved – period. The actual filming miniature had deflector grid lines on the primary (saucer) hull, but they were little more than pencil lines (which disappeared on film and screen). Can the engraved lines be filled? Probably, if you feel like going through all that effort. Can I live with it? I guess so.
Conclusion
This is a great kit and I can’t wait to build it. If you’re a big Trek fan like me, it’s a must-have addition to your kit stash and build list. Despite my gripe on the grid lines, I’m still thrilled to death about this model. It’s big and will make a great display with the Tamiya 1:350 U.S.S. Enterprise nuclear carrier (like that Star Trek Enterprise size chart we’ve all seen) as well as with the 1:350 Enterprise re-fit and the Enterprise NX-01, also in 1:350.
Polar Lights has also issued two additional detail sets for this model, with full details on their website (I don’t have either one and will not be obtaining them). First is the Supplemental Parts Pack, which has parts to allow you to retro-fit your Big E as one of the vessels from the first two pilot episodes, with nacelle caps, bridge domes, decals, etc. Then there’s the Deluxe Accessory Set, which has all the lighting goodies you’ll need, as well as fan motors for the Bussard collectors, weathering decals, and PE parts.
A quick look around on-line to places like CultTVman’s Hobbyshop webstore will provide you with other after-market items for your Polar Lights 1:350 Enterprise kit. So, you can go as crazy as you like with this model depending on your modeling skills and modeling budget.
While visiting the Round 2 website the other day, I noticed that they had posted painting corrections (from the ones found on the kit box). They can be found below.
Also, a full instruction sheet is available.
The only other thing I can say is, “ALL AHEAD MR. SULU! FULL WARP!”
Many thanks to IPMS for allowing me the opportunity to review this kit.
Photo captions
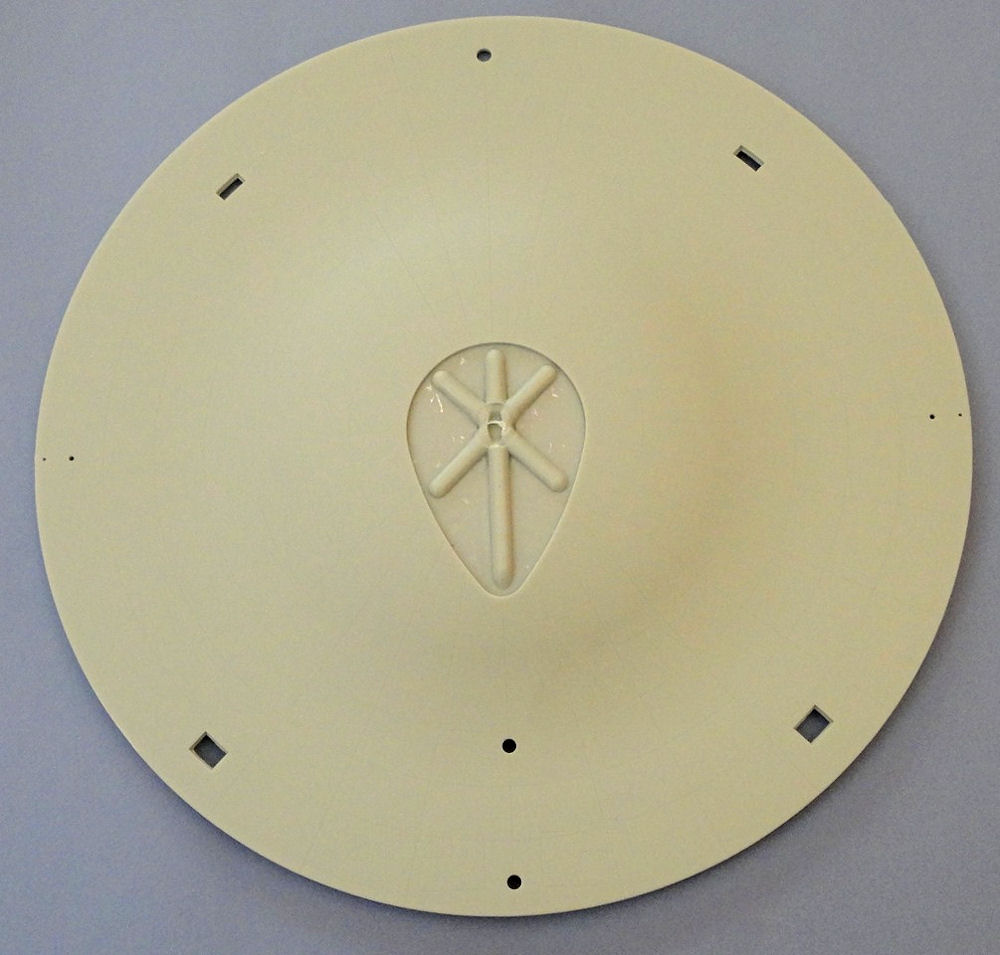
- Photo 1 – Primary hull – top section
- Photo 2 – Primary hull – lower section
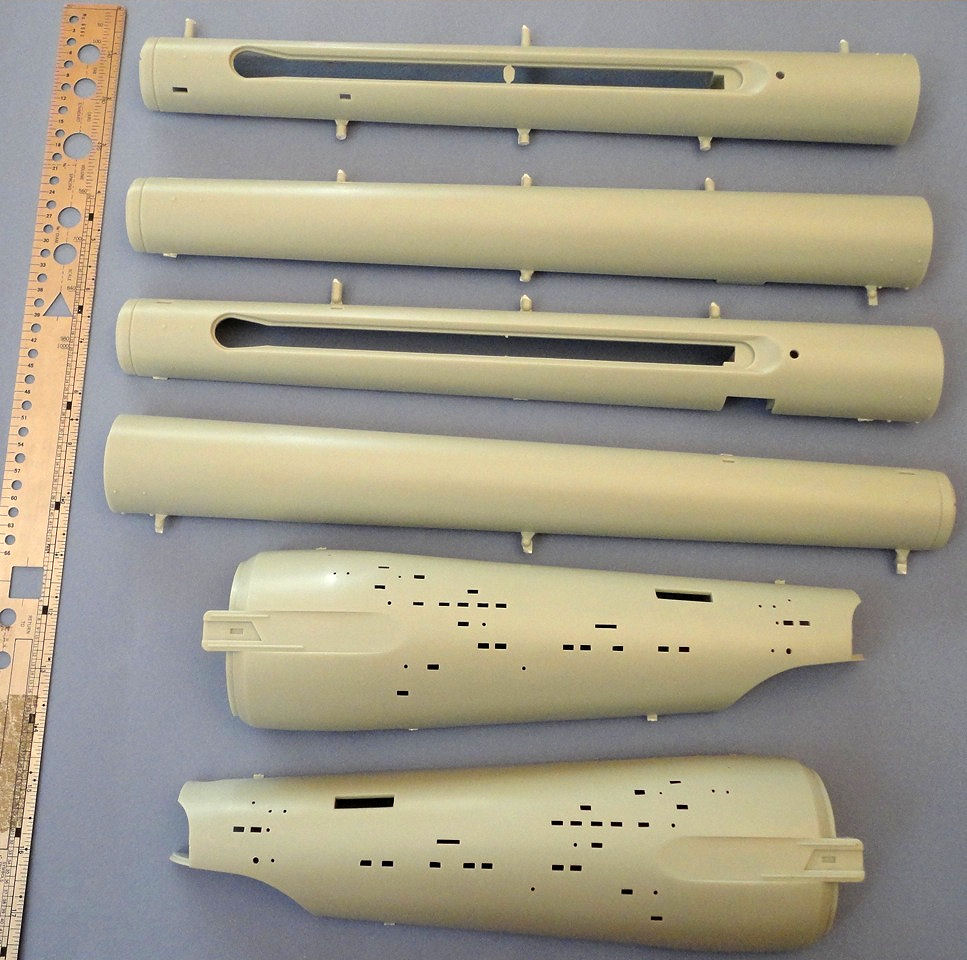
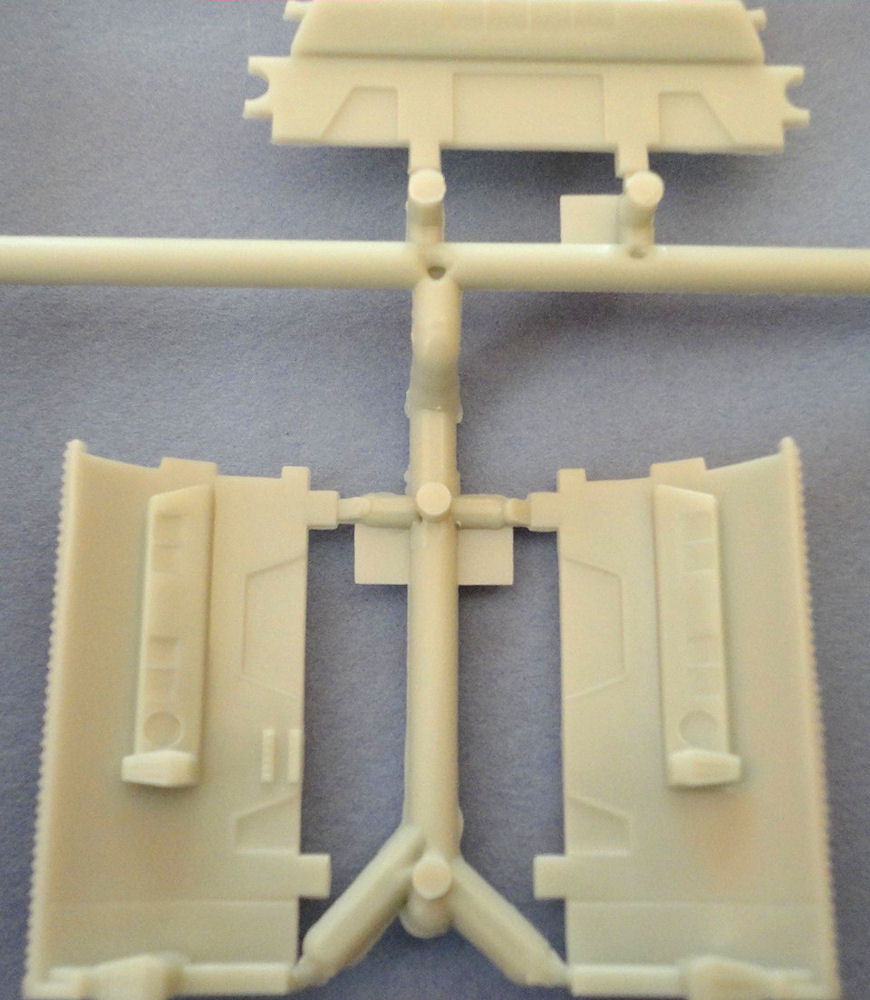
- Photo 3 – Warp nacelles and secondary (engineering) hull section halves
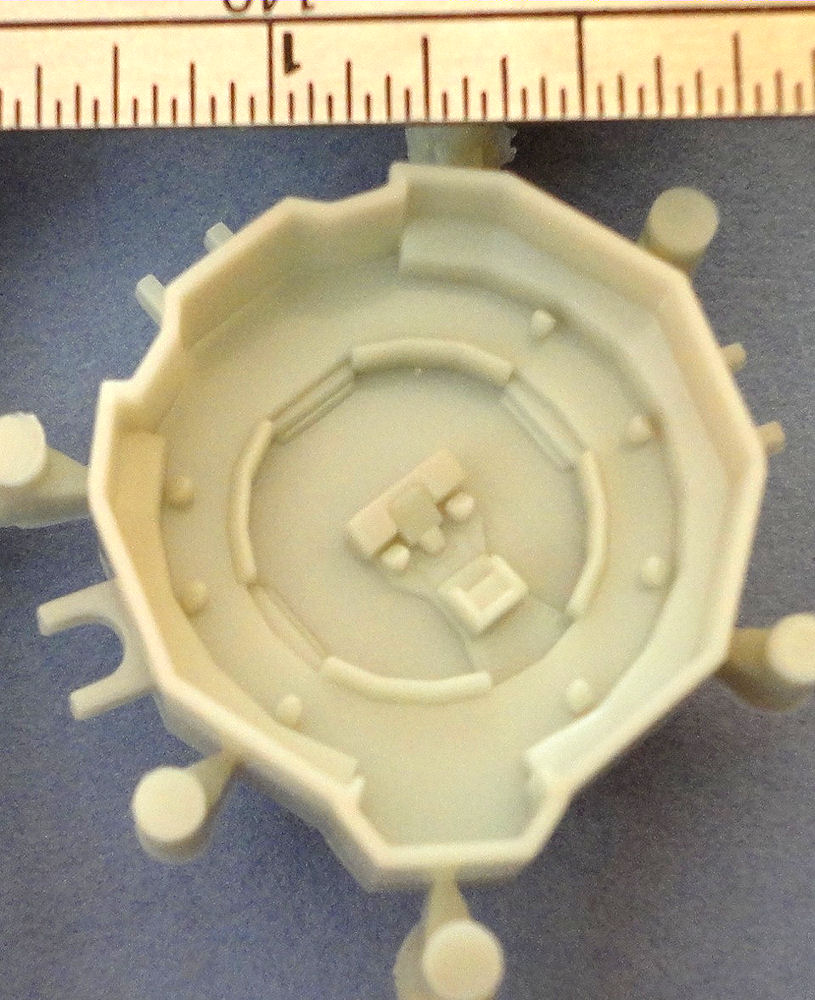
- Photo 4 – Photo showing interior bracing for parts strength and assembly integrity: secondary hull access pylon and warp nacelle pylon mounting points; display stand reinforcement area
- Photo 5 – Photo showing interior bracing for parts strength and assembly integrity: warp nacelle pylon mounting points
- Photo 6 – Detail parts sprues, including upper saucer deck sections; notice alternate hangar bay doors: opened and closed
- Photo 7 – Detail parts sprues
- Photo 8 – TEXT REFERRAL: short-shot areas of rear warp nacelle end caps
- Photo 9 – Detail parts sprues; warp nacelle pylons and main access pylon
- Photo 10 –The bridge
- Photo 11 – Additional hangar bay interior parts
- Photo 12 – Top of shuttlecraft hangar deck interior
- Photo 13 – Shuttlecraft parts
- Photo 14 – Bussard collector parts, as well as deflector/sensor dish
- Photo 15 – Window insert parts sprues in three different colors of plastic
- Photo 16 – More window insert parts sprues – clear plastic
- Photo 17 – More window inserts sprues
- Photo 18 – Warp nacelle pylons – interior bracing
- Photo 19 – Lower saucer section close-up showing engraved deflector grid panel lines
- Photo 20 – View of upper saucer section showing engraved deflector grid panel lines.
- Photo 21 – Parts for display stand
- Photo 22 – Box art
- Photo 23 – Side panel of box with typical paint call-outs
- Photo 24 – Decal sheet
- Photo 25 – Decal sheet details shot showing shuttlecraft markings as well as bridge main view screen, etc.
- Photo 26 – Bottom of box with finished bridge and shuttlecraft bay details of actual model

Comments
Add new comment
This site is protected by reCAPTCHA and the Google Privacy Policy and Terms of Service apply.